My scenario involves transferring a large volume of Mac data between two external hard drives. Specifically, I need to copy over 2TB of (pictures, videos and bookstores of the Photos application) between two external storage media (HDDs)-from LaCie5 to Lacie4. If you are interested in how you can safely copy a large volume of data on Mac, this tutorial will definitely help you.
Table of Contents
Why do you have to take into account before you start a large data transfer
1. Make sure that on your destination HDD you have enough space for the new data.
2. Use connecting ports and cables that support high transfer speeds. Preferably USB 3.0/3.1 or thunderbolt).
3. Ideally, the HDDs or SSDs between which the data exchange should be formatted. For Mac, APFS or HFS+ are the most optimized.
4. Allocate time to this operation. Whatever the method used, the transfer of a large volume of data will involve a considerable period of time. For 2TB on USB 3.0 port (real speed ~ 100-150 MB/s), the transfer can take 4-6 hours. On USB 2.0 (~ 30 MB/s), it can take 18-24 hours.
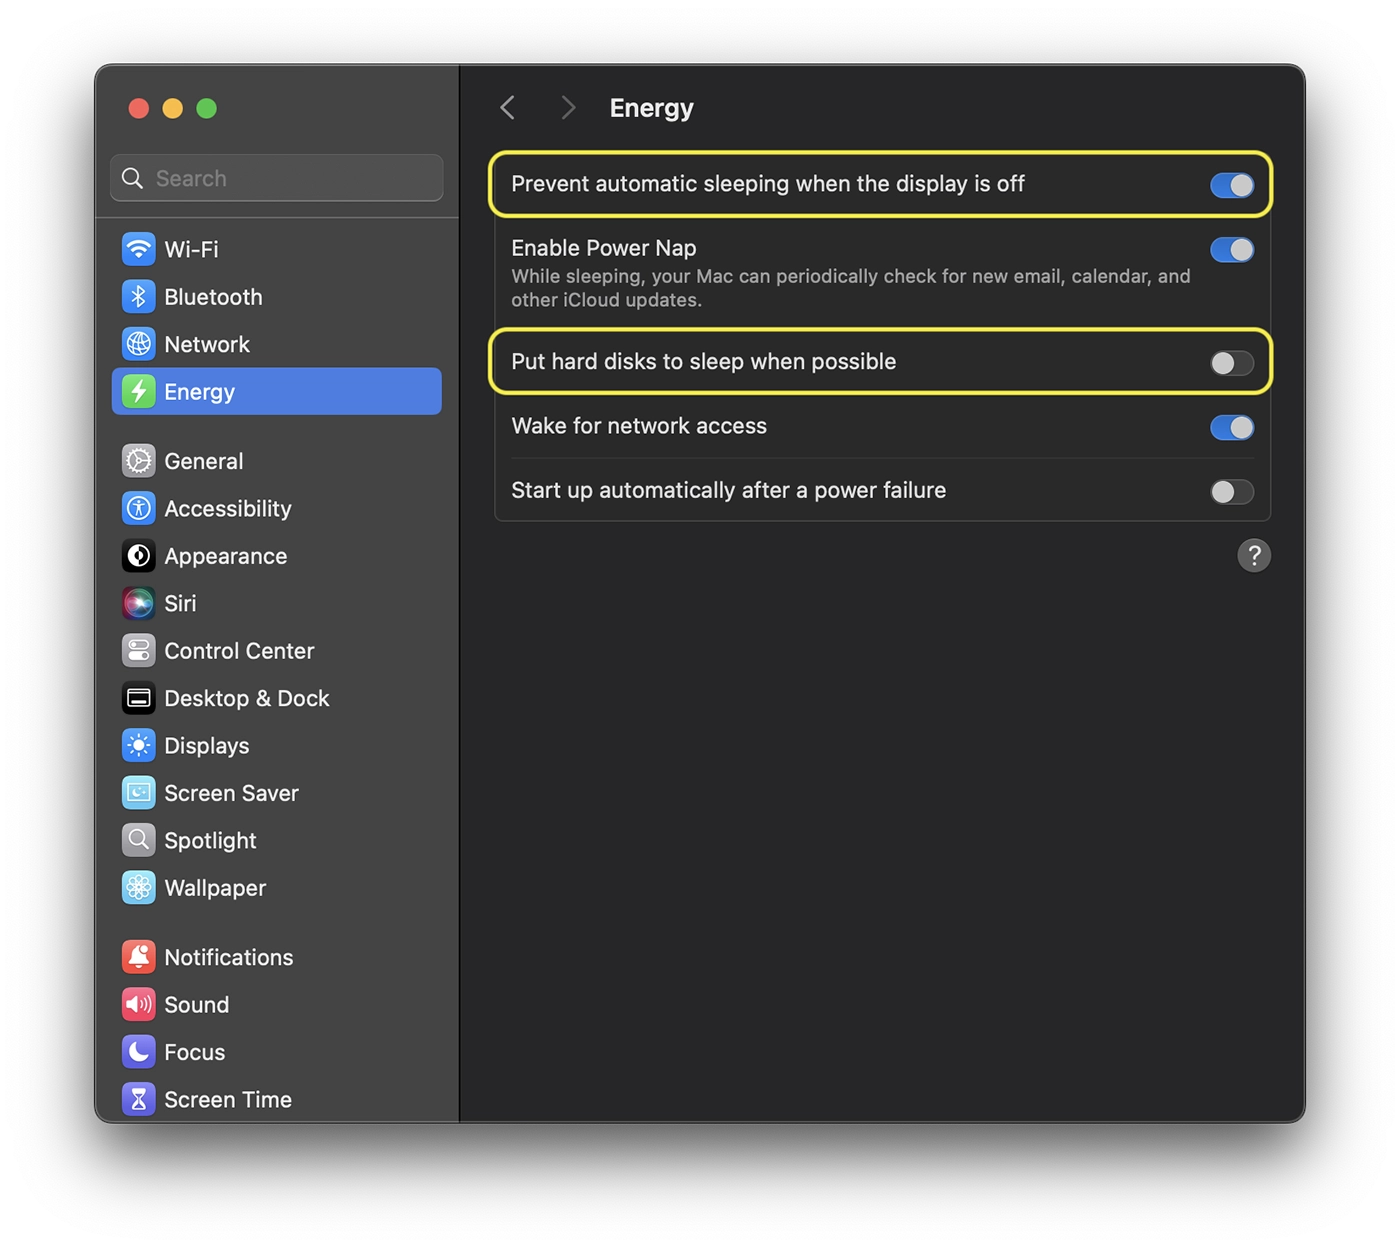
5. Disable Sleep mode for Mac and hard drives. Thus avoid suspending the transfer with the entry into Sleep mode.
Mergi în: System Settings > Energy > Prevent automatic sleeping when the display is off (Activat) / Put hard disks to sleep when possible (Dezactivat).
That being said, you will continue to see how you can safely copy a large volume of data on Mac, without taking care of the interruptions or data losses.
How to securely copy a large volume of Mac data between two HDDs
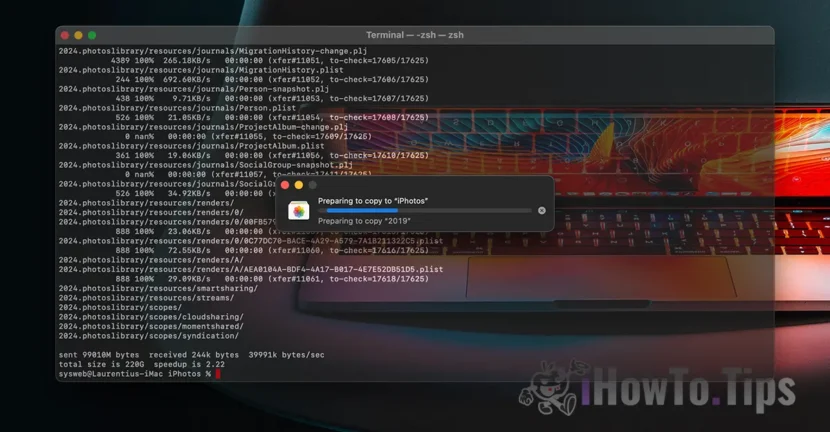
When you have a large volume of data, as my case, you do not want to use the classic method through Finder. That is, to do "copy/paste". This process can be blocked, data corruption may occur during transfer and then the process will have to be resumed from the beginning. In addition, only "preparing to copy ..." I think it would take a lot.
The most effective method in such situations is the order rsync executed in the terminal utility. RSYnc is an integrated tool into macos, ideal for large transfers, because it checks the integrity of data and can resume transfer in case of interruption. Basically, if for any reason the transfer has been interrupted, its resumption will be done from the point where it remained (avoids redundant copying of the already transferred files), checking the integrity of the copied files prior to the interruption.
The order of copying / transfer of data with RSYNC is as follows:
rsync -avh --progress /Volumes/Source/ /Volumes/Destination/What does this order do rsync:
-a: Keeps the files and file structure.
-v: Displays details.
-h: human format for dimensions.
--progress: Show transfer progress.
If the source and / or destination folder have names with spaces, it is good to use quotation marks ("..."), to be clearer and avoid errors if the Shell misinterprets escaping.
For my scenario, I used the order:
rsync -avh --progress --no-links "/Volumes/LaCie5/laurentiu/Photos (macOS)/2017 (Travel).photoslibrary" "/Volumes/LaCie4/iPhotos/"Basically, I avoided any wrong interpretation of the bookstore created by the Photos application: 2017 (Travel).photoslibrary. Also in my order line in the terminal, I added--no-linksTo avoid copying Symbolic Links as links (Photos libraries can contain internal links, and this copies them as real files).
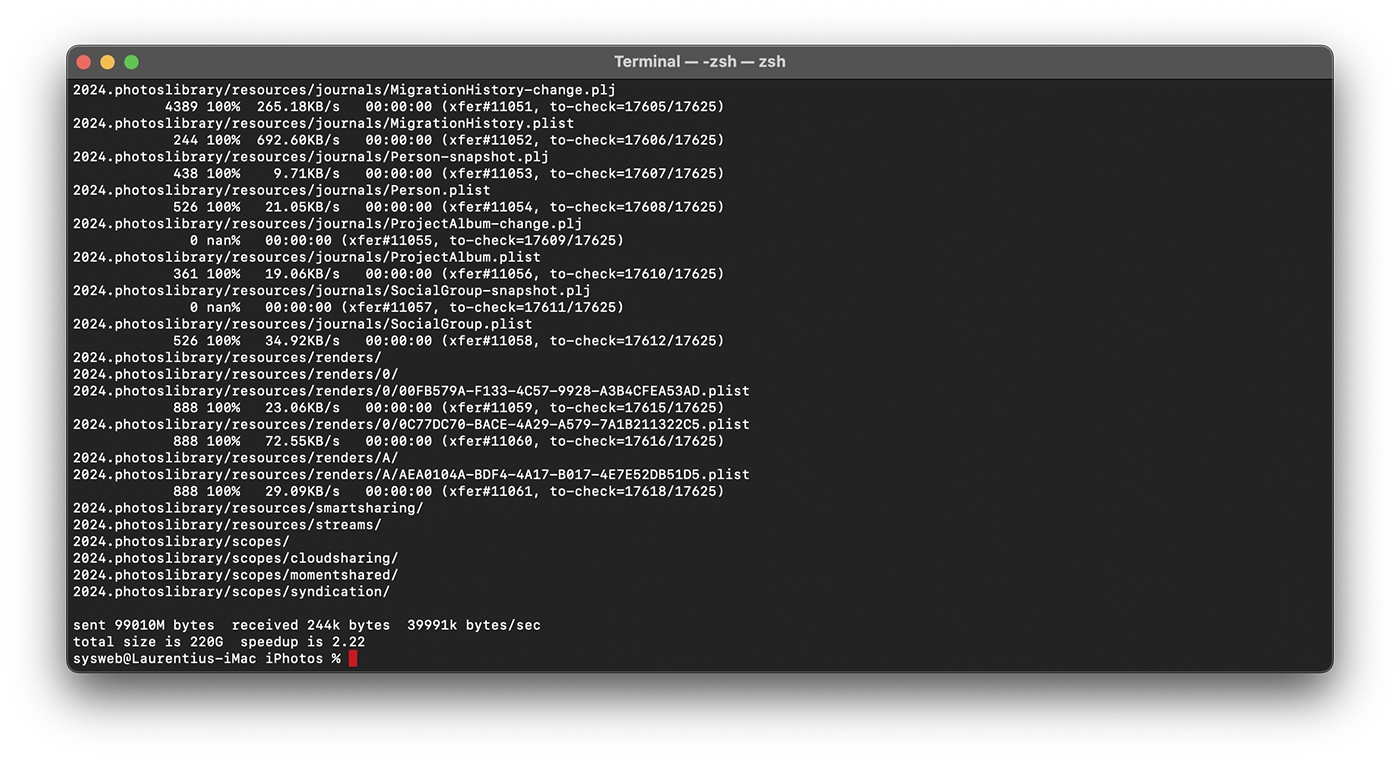
At the end of the copy process you will receive a brief summary, which looks as follows:
sent 99010M bytes  received 244k bytes  39991k bytes/sec
total size is 220G  speedup is 2.22
In my case, the speed was very low because during the copy I also run other applications on the HDDs involved in the transfer, which is not recommended to do.
This way you will be able to copy a large volume of data on Mac, without being afraid that the transfer can be blocked. Whenever, if something happens and the transfer is interrupted, you can resume the command line and it will continue. It also takes into account the fact that if the already copied files have undergone changes in the source location, they will be rewritten in the destination location.
Verification of data after copying
If you have very important data, it is recommended that at the end of the copy process you will check them. You can compare the source and destination file dimensions, using the command du.
du -sh "/Volumes/Source/"
du -sh "/Volumes/Destination/"
If the values are identical, it means that the copying process has been done correctly. You can also run additional verification order:
rsync -avh --checksum --dry-run "/Volumes/Source/" "/Volumes/Destination/"The data should be identical, a sign that in the destination location you have the same files as in the source location from which they were copied.
Related: Trash can’t be opened right now because it’s being used by another task.
În concluzie, dacă ai un volum mare de date, nu este recomandat să utilizezi clasica comandă copy&paste în Finder. Comanda rsync In the terminal utility it will relieve you of the loss of data during the transfer and the risk of taking it from scratch if the copy is blocked or interrupted.