To protect personal data and organize the storage space more efficiently, to create several encrypted partitions on a USB memory is a good solution for the management and security of stored data. Whether you want to separate your personal files from the professional ones, share some of the space with other users or add an additional layer of security, the encrypted partitions help you protect your information from unauthorized access.
If you have a USB memory with a larger storage space, in this tutorial, I will show you step by step how to create more encrypted (password) partitions on a flash drive, using the Apple File System, which allows you to flexible storage.
Table of Contents
How can you make more partitions on a USB (MAC) memory
With the introduction of the Apple System (Apple) system in the spring of 2017, it has become possible to divide the volume of a hard disk into several compartments, called containers, without the need for traditional disk space. In the APFS file system, "container" refers practically to a partition, with the mention that the space allocated to a "container" can be dynamic. From the total space of the disc (container), a predetermined space (volume) or a dynamic one can be shared, which will use the entire storage capacity, if the other partitions do not have a reserved volume. Thus, in the end, you can get several encrypted partitions on a USB memory.
In addition to these options for the management and security of stored data, a major advantage of APFS is that adding and deleting APFS volumes is simpler and faster than in the case of classic partitions.
In our example, we will take a 256 GB Flash Drive Drive that we want to divide into two volumes. Two virtual partitions: one visible for all users and one encrypted and password protected.
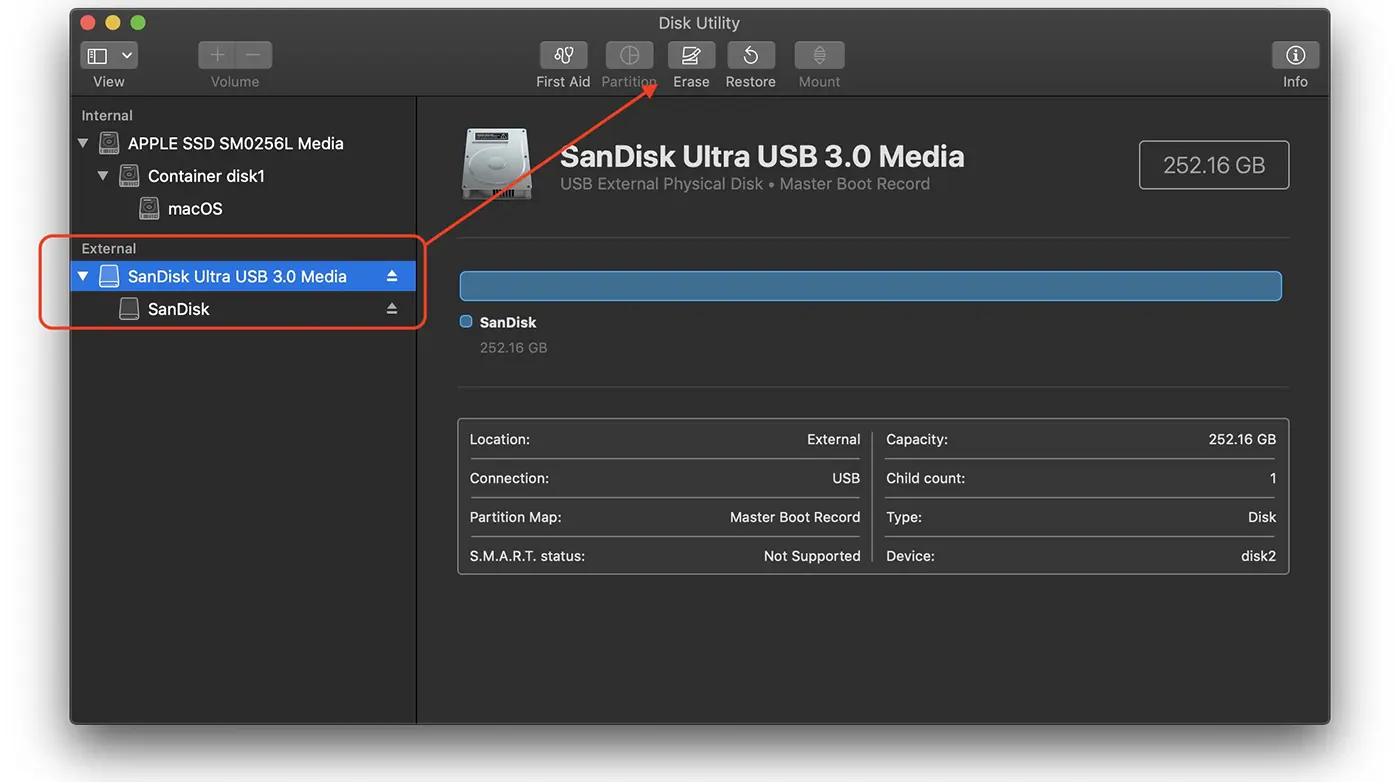
1. Connect USB memory to Mac. In my example I have an ultra USB 3.0 media sandisk, connected to Mac.
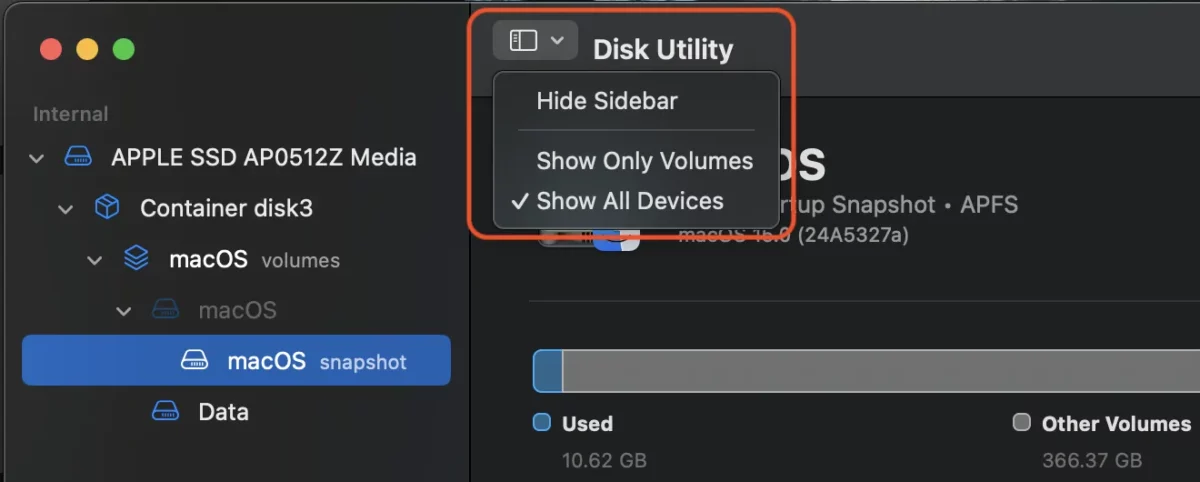
2. Open the management of the storage spaces, then go to the left-handed menu, where you select all the devices (show all devices).
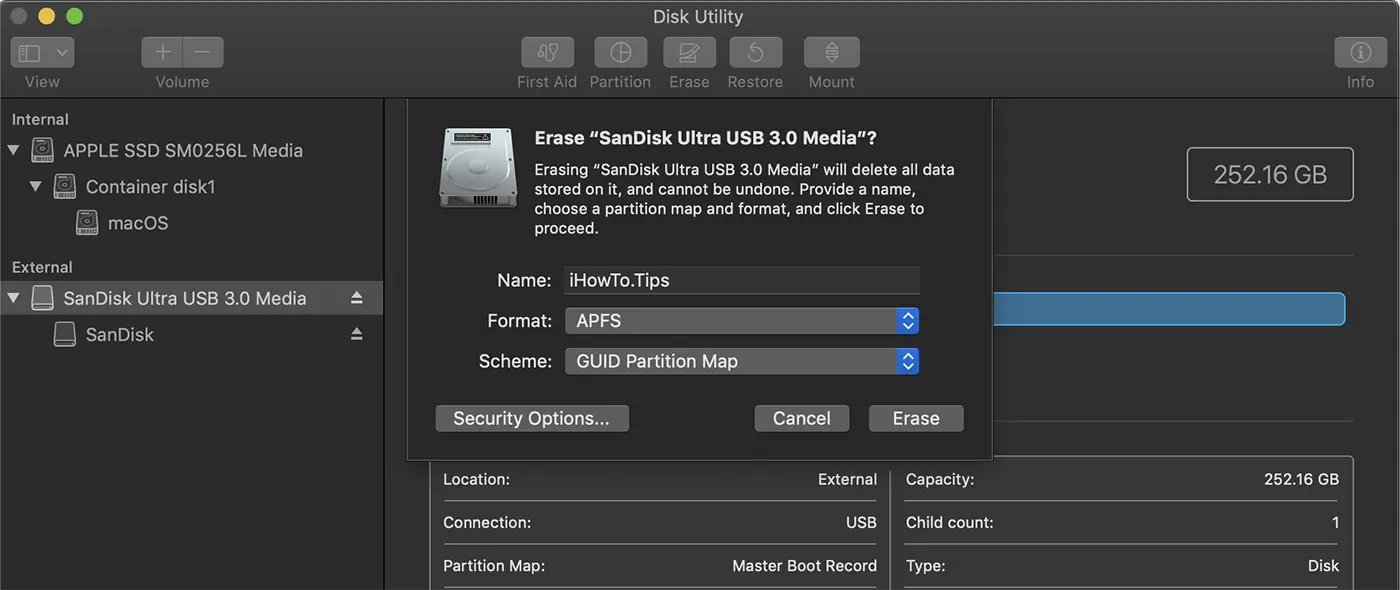
Before the next step make sure you have no important data stored on USB memory. The next step will delete all stored data.
3. Select the USB (Flash Drive) memory from the left side, then click on the delete button.
4. In the opening dialog box, enter a name for the new partition, select the format of APFS file systems and the "Guid Partition Map" scheme. Click on the delete (erase) button.
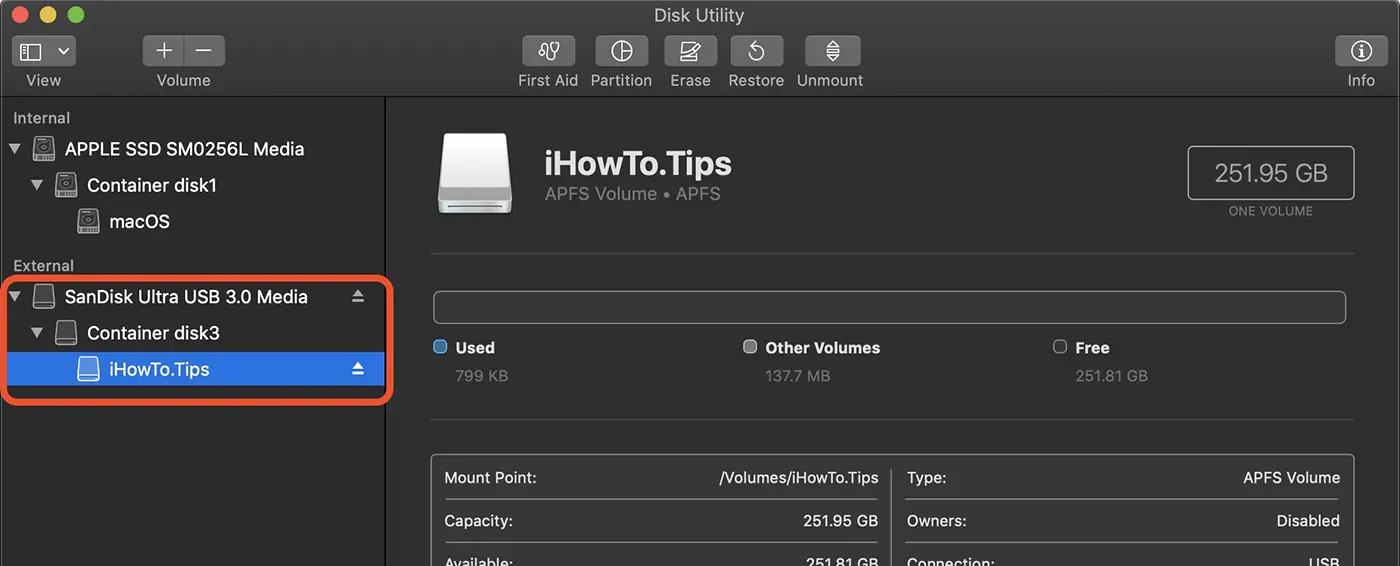
After the completion of this operation, under the name of the physical hard drive the new "container" will appear which will include the "volume" with the name chosen.
How can you create encrypted partitions on a USB memory
Next, you will see how you can create encrypted partitions on a USB memory, along with the "container" created above. In other words, a new password protected partition will be made on the USB memory.
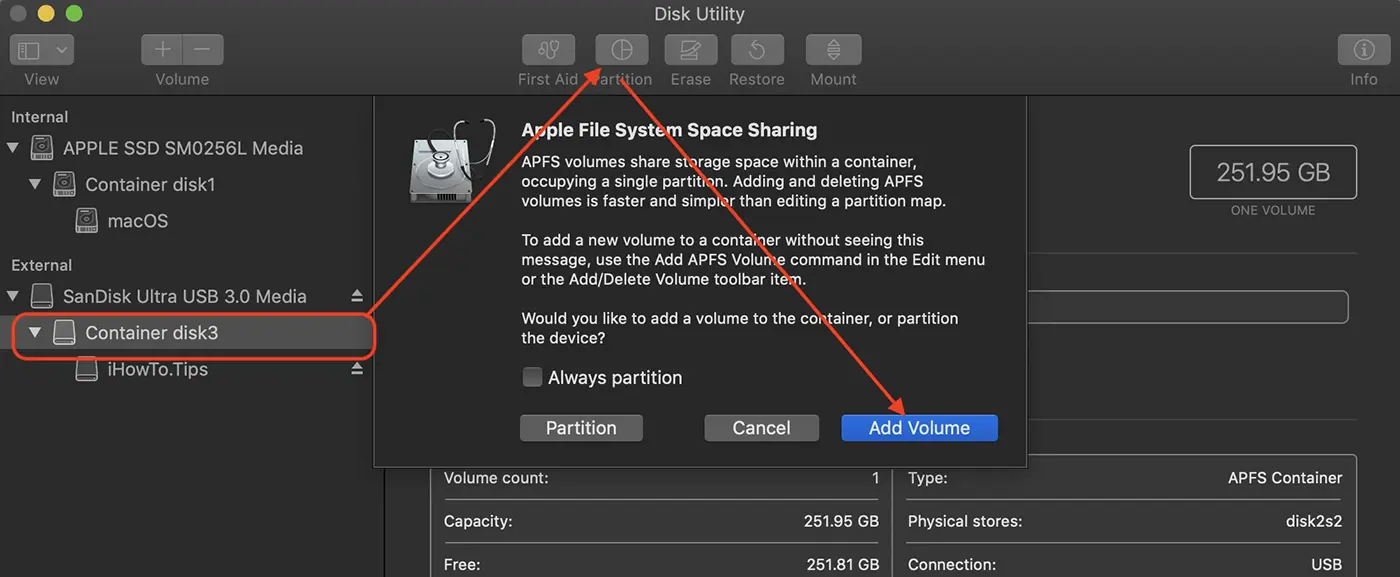
1. Select the "container" of the USB memory in which the new encrypted volume will be added.
2. Click in the upper bar on partition options.
3. Click on the button by which you add a new volume.
In the image below are illustrated the steps you need to follow in Disk Utility.
4. In the dialog box adding a new APFS volume to "Container", select "APFS (ENCRYPT)".
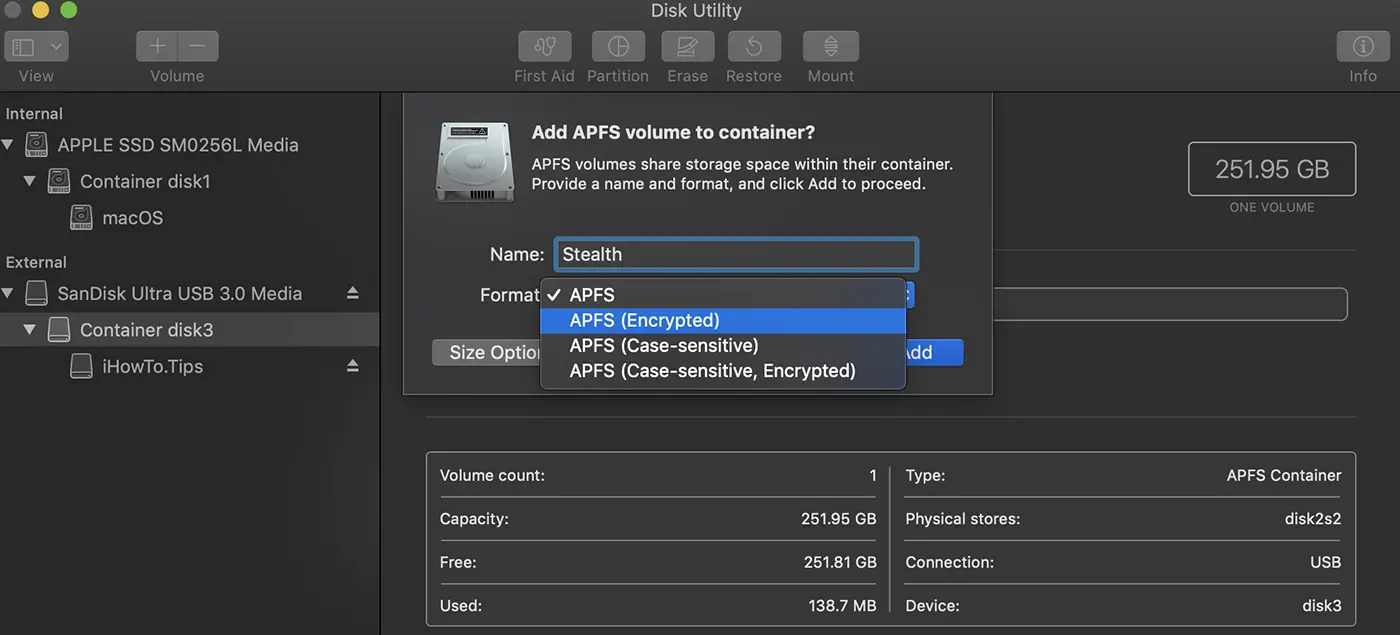
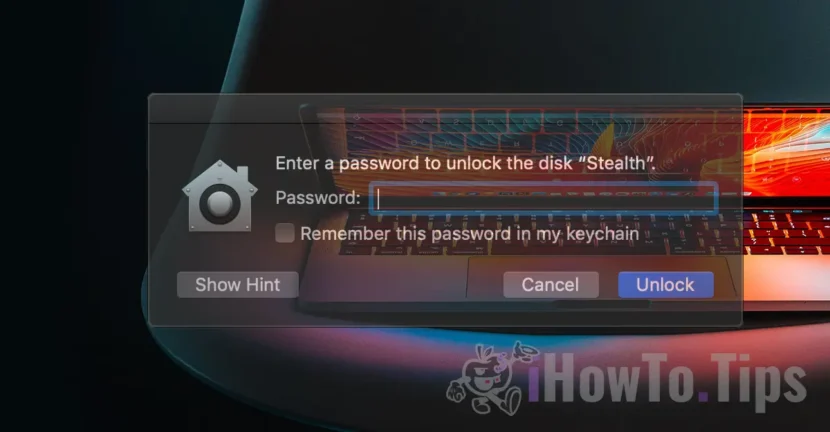
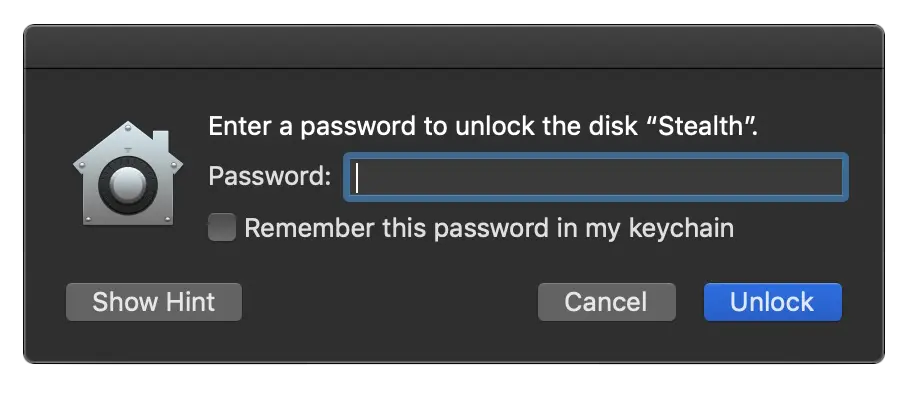
5. You choose an encryption password of the newly created volume.
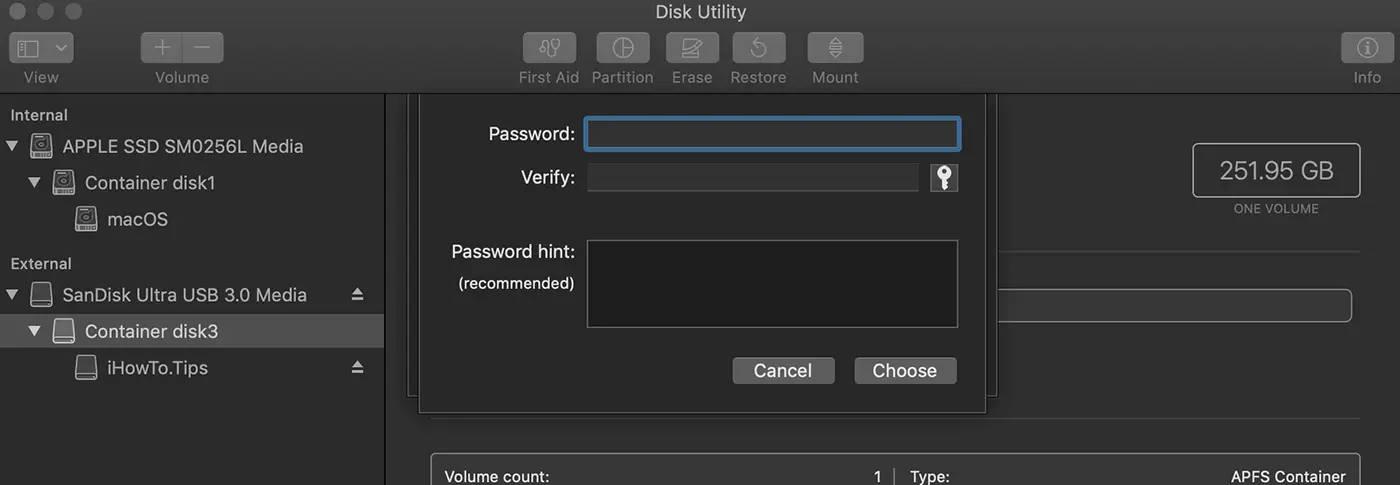
6. Click on the button ”Add"And you are waiting for the operation to be completed.
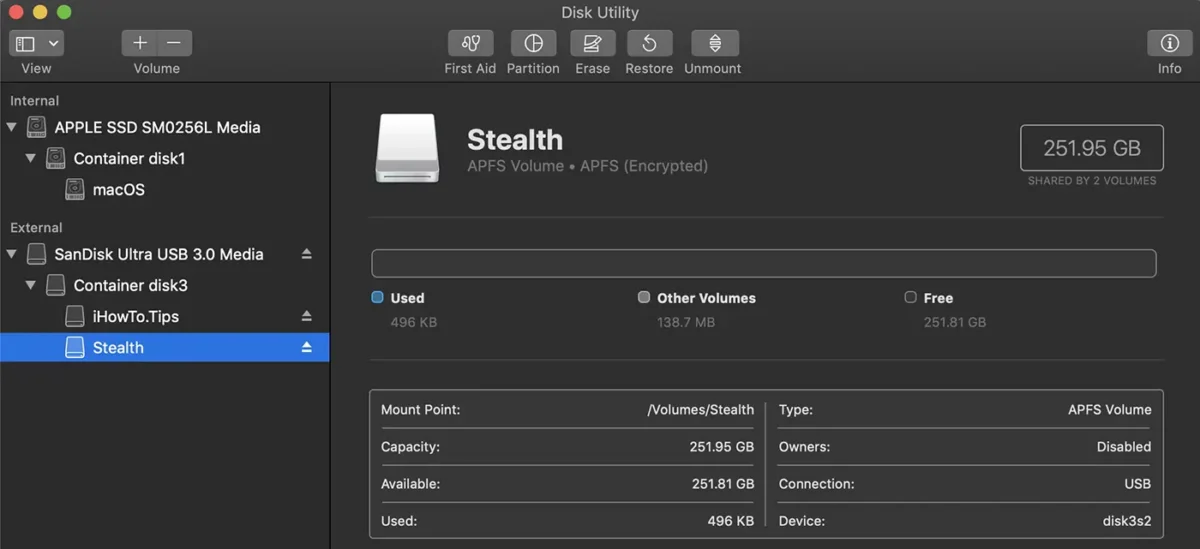
At the end of this operation you will get two volumes under the same container, both dynamically dividing the total container. A volume can be accessed as soon as you connect the USB memory to Mac, while for the encrypted volume it will need a password to access the data stored on it.
You can also choose to encrypt the entire container. Thus, the USB memory can only be accessed after the encryption password is introduced.
Related: Optimization of disk storage space on macos - Storage Management
In this tutorial, you saw step by step how to create more partitions encrypted on a USB memory, using a MAC and the APFS file system, which allows you to flexible storage management.