
Despite the limitations often encountered in the interaction between Windows PC and MAC systems, Apple offers users the ability to install the latest Windows versions on any MAC device. Moreover, Macos provides an effective utility, with which you can create a bootable USB stick on Mac, in a very simple way.
With this bootable USB stick created on Macos, you will be able to install Windows 11 on any compatible computer, including Mac.
The steps in this guide in which you learn how to create a bootable USB stick on Mac, are presented on the Macos Monterey operating system, but it works in the same way and on the older and newer versions, such as Macos Sonoma.
How can you create a bootable USB stick with Windows on Mac
Before you start, you need a USB stick with storage capacity of at least 8 GB and not stored important data. This USB Stick will be formed at the time of writing the Installation Image of Windows 11.
1. Download the ISO image with the latest version of the Windows 11 operating system on the official Microsoft page.
Download Windows 11 ISO (Microsoft)
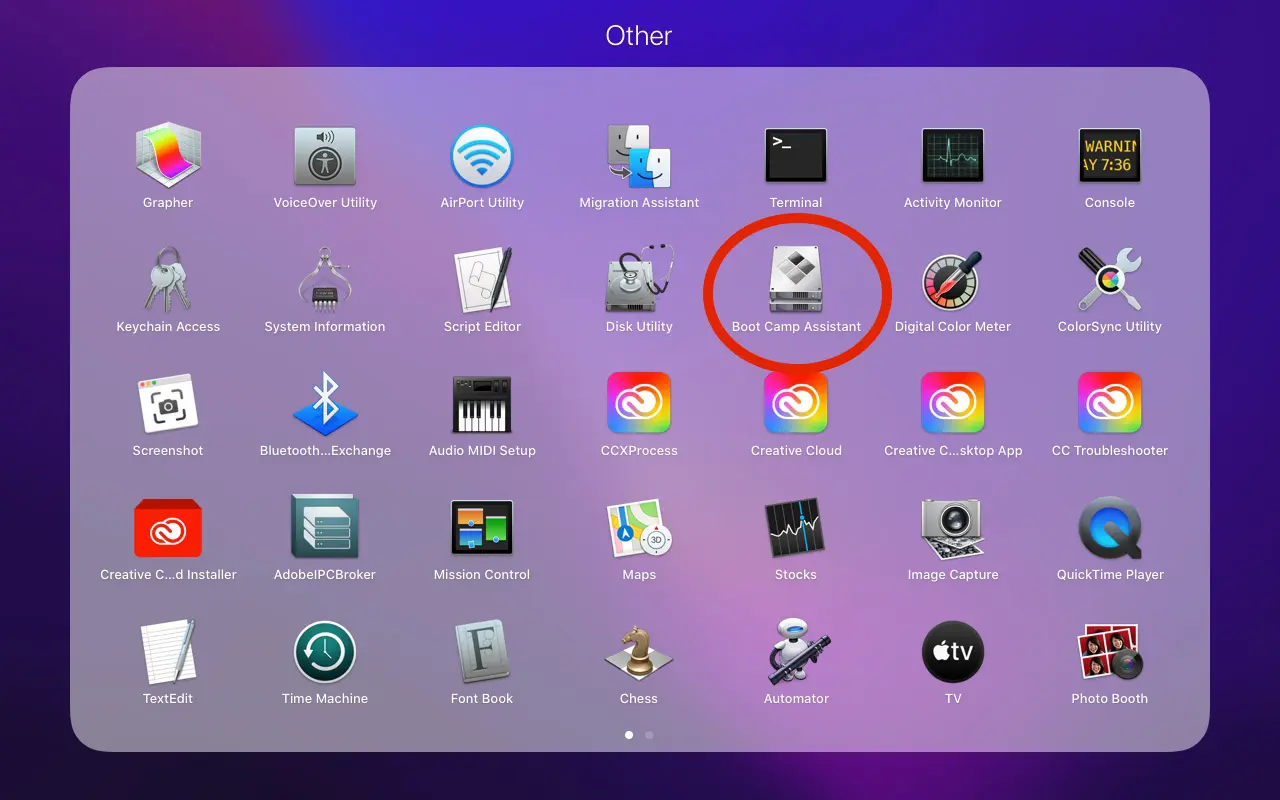
2. Connect USB Stick to Mac, then open the boot camp assistant utility.
You can find this utility in: “Applications” > “Utilities”.
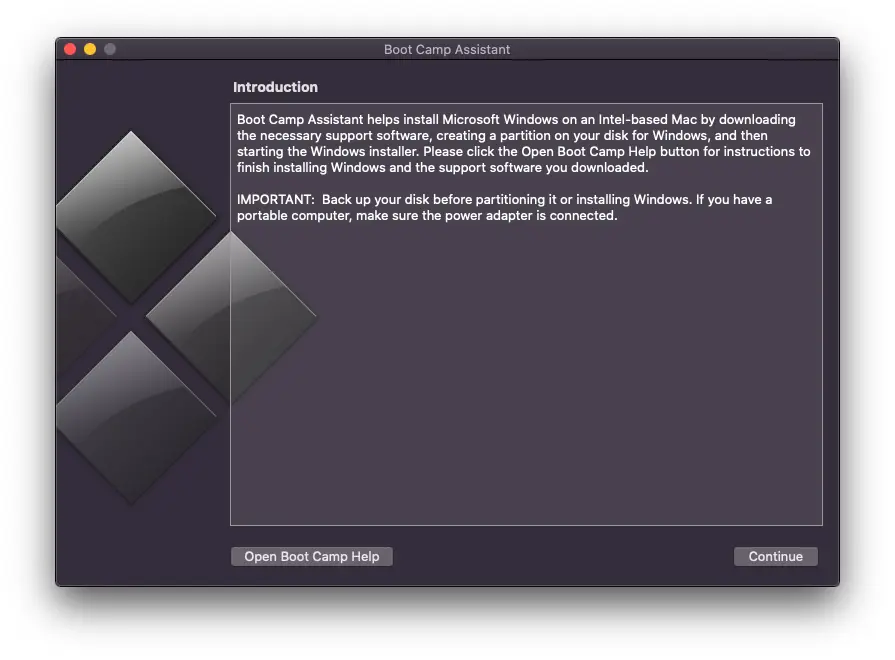
3. In the first screen of the utility, immediately after opening Boot Camp Assistant, click on the "Continue“.
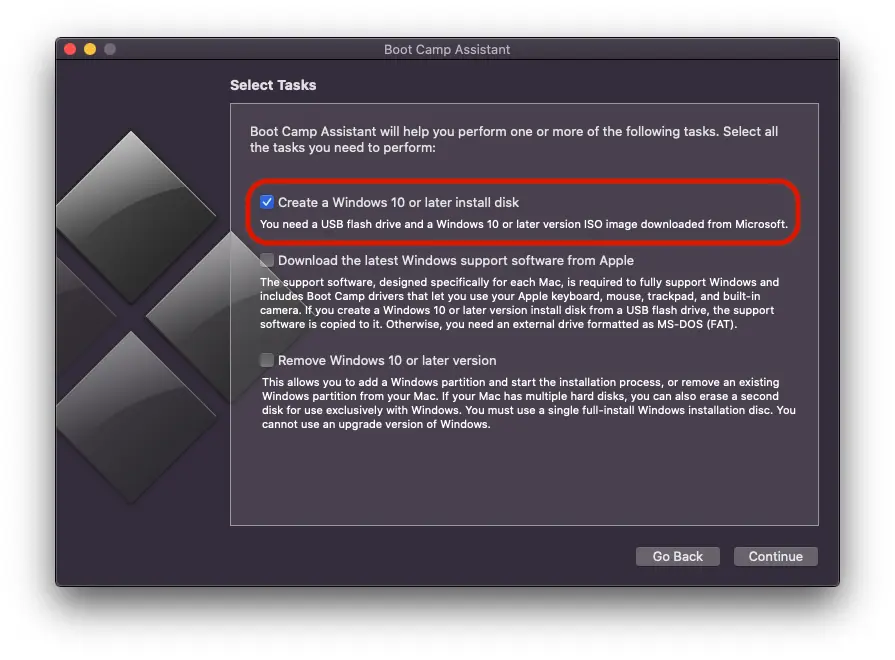
4. At the next step select only the first option. "Create a Windows 10 or later install disk"Then click on"Continue“.
As a parenthesis, it is very possible that the last option from this step will differ, if you do not already have Windows installed in Dual-Boot on the MAC device. In my case, there is the option by which I can delete the Windows 10 operating system on Mac. "Remove Windows 10 or later version“.
5. At the next step you have to choose the .ISO file with the Windows 11 operating system installation, and then select the drive on which this image will be written. Basically, at this step you create a bootable USB stick with Windows on Mac.
Clicik “Continue”.
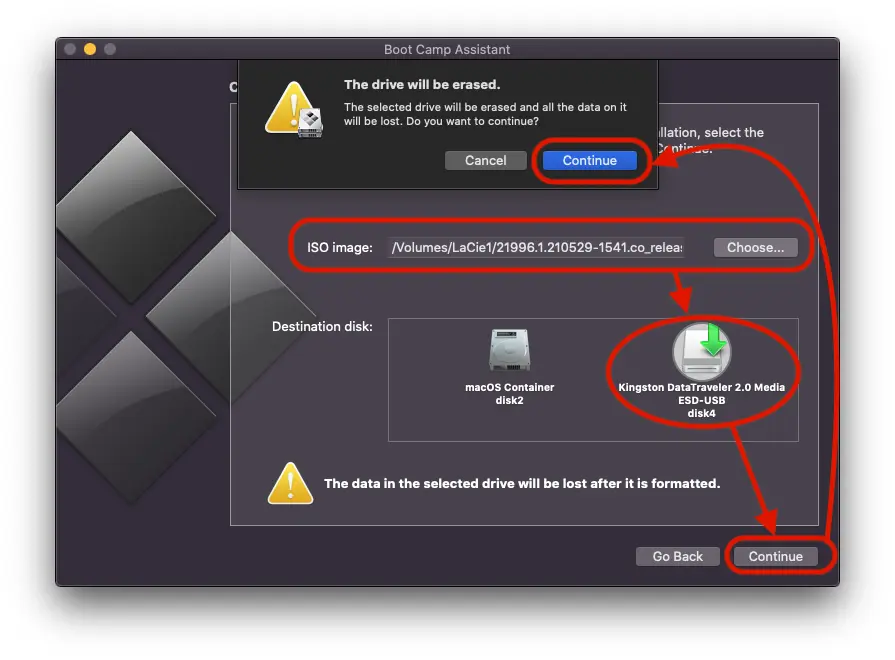
Wait until the process of formatting and copying the Windows 11 installation files is completed on the USB Drive. During this time it is very important not to disconnect USB drive from Mac.
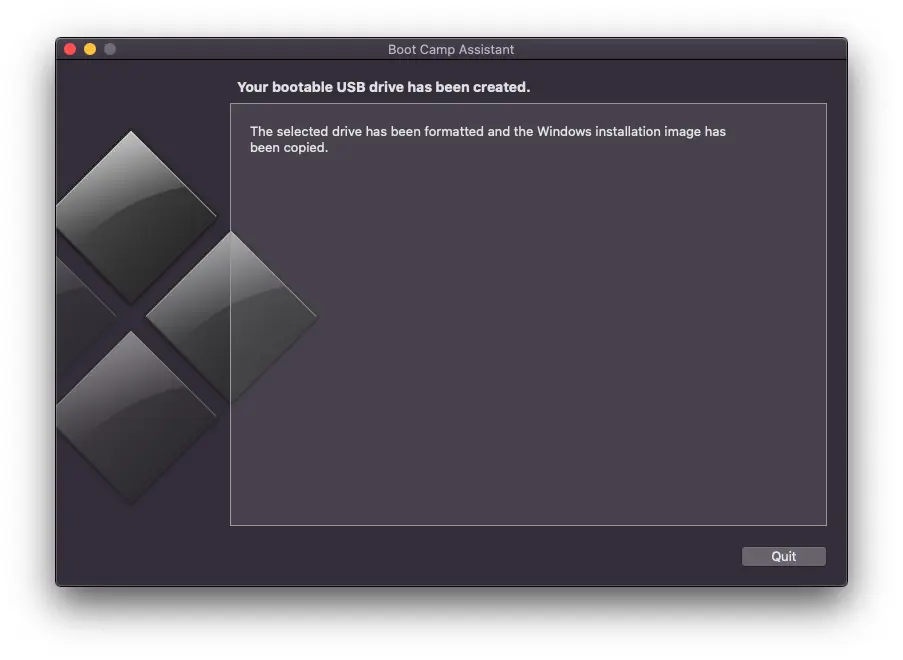
After this last step is completed, you managed to create a bootable USB stick with Windows on Mac in just a few minutes.
Related: How do you delete the Windows operating system installed on a MAC device?
With this USB stick obtained with the above guide, you will be able to install Windows 11 on any computer or compatible poppy.


2 thoughts on “How can you create a bootable USB stick with Windows on Mac"