Pictures and clips made with iPhone, iPad or iPod Touch may be stored and TRANSFERRED in different ways, depending on our preferences and the operating system on which we are going to make the transfer. Of course, the easiest way to transfer photos from your iPhone, iPad or iPod Touch is to a Mac. Apple offering multiple synchronization solutions between the idevices in their own ecosystem. iCloud Photos, Airdrop and via USB cable, are the simplest methods by which photos and videos can be transferred from iPhone, iPod Touch or iPad to Mac.
Method 1
iCloud Photos - How to transfer photos and videos from iPhone / iPad to Mac and Windows
Each owner of an Apple device must create an Apple account (Apple ID / iCloud Account) from the initialization phase of the device. This account can be added to several devices of the same person, and the content of Photos can be synchronized. For example. a picture taken with iPhone will be present on both iPad and Mac. All we need is for the iCloud Photos option to be activated on all devices on which we want the photos taken with the iPhone to be present.
Activating iCloud Photos on iPhone, iPad or iPod Touch is made of: Settings → Photos → activam iCloud Photos.
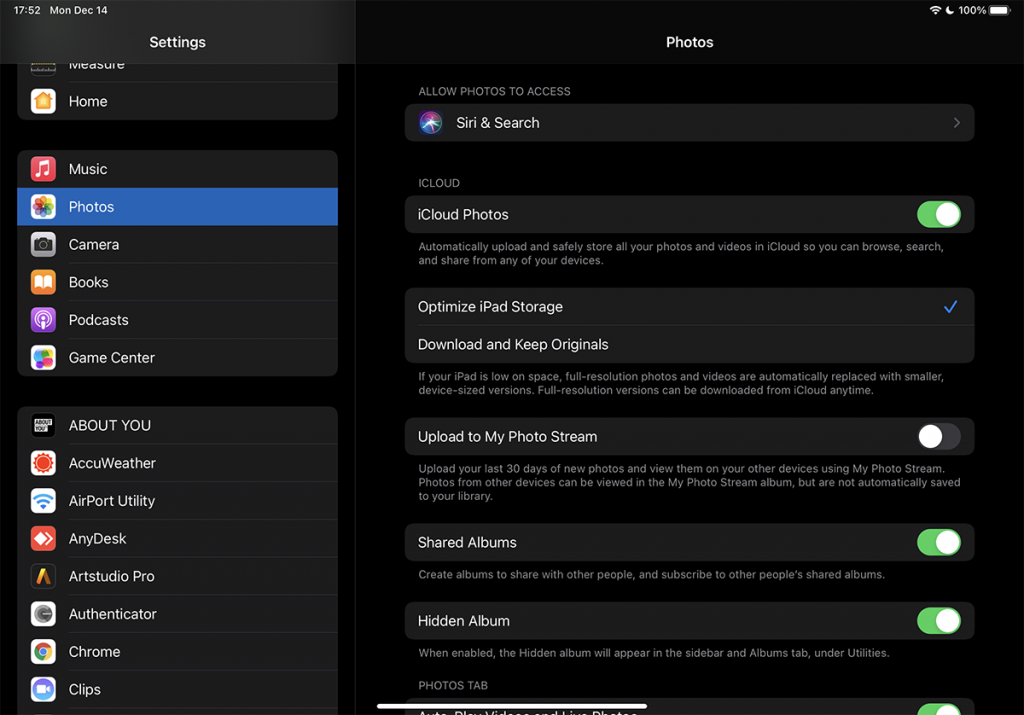
Here we also have the option to keep the pictures and videos in full size on the iPhone / iPad, or we can keep a the optimized version (Optimize iPhone Storage) to save storage space. The full version will be available whenever we want to open the picture or video on the device.
If on the iPhone or iPad we have selected the option "Download and Keep Original", remember that on the device they will be synchronized to their original size, including pictures and videos taken with another device that has authenticated the same iCloud account. For example, if we take pictures with an iPhone, and on the iPad we have the option "Download and Keep Original", then the photos taken with the iPhone will be downloaded originally on the iPad. The same will happen with the videos, screenshots or images saved from the web on the iPhone. The same thing will happen on the iPhome, if you take the photos with the iPad. They will be found in the Photos gallery alongside those taken with the iPhone.
For Mac owners, transferring photos from mobile devices via iCloud Photos is very easy. open the Photos app on your Mac (natively installed on macOS) and go to the menu: Photos → Preferences … → icloud → check the option "iCloud Photos“.
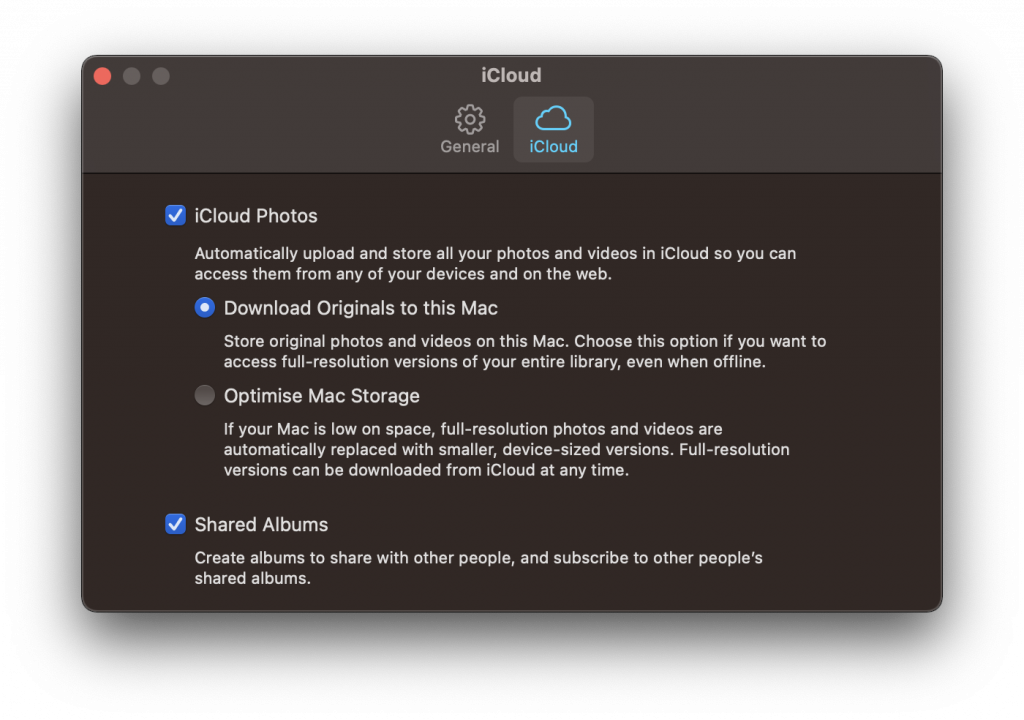
And here we have the options I talked about earlier. "Download Originals to this Mac” and it will automatically take up more storage space on the hard drive, or “Optimise Mac Storage", and miniature copies of the original pictures and videos will be kept.
When we open a picture, it will be downloaded from iCloud in its original size (internet connection required).
With the "iCloud Photos" option activated on Mac and iPhone, photos can be transferred in both directions. If we import pictures from the hard drive into the Photos application on the Mac, they will be automatically synchronized on the iPhone, iPad or iPod Touch.
The pictures and videos from iCloud Photos they will of course take up the space allocated to your account. Every iCloud user receives free 5 GB, following that for more space you need to make a monthly subscription. 0.€99 for 50GB, 2.99 EUR / 200 GB and 9.99 EUR for 2 TB.
Transfer photos and videos from iPhone to Windows PC it's as simple as that. All you have to do is to install the iCloud app for Windows, let's go Authenticated with your iCloud ID and choose what you want to sync. The iCloud application is available for free in the Microsoft Store.

Photos and videos are also available online on icloud.com from any device that allows web browsing. Including from one Smart TV.
Method 2:
Transfer via USB cable: How to transfer photos and videos from iPhone or iPad to Windows PC and Mac
Even though the iPhone and iPad are very popular devices, the same cannot be said about them Mac, iMac, Macbook Pro or Macbook Air. In almost all countries, most iPhone owners have a laptop or a PC with an operating system at home Windows.
Transfer photos and videos from iPhone to a Windows PC it is done most simply by data cable / iPhone charging. USB to Lightning.
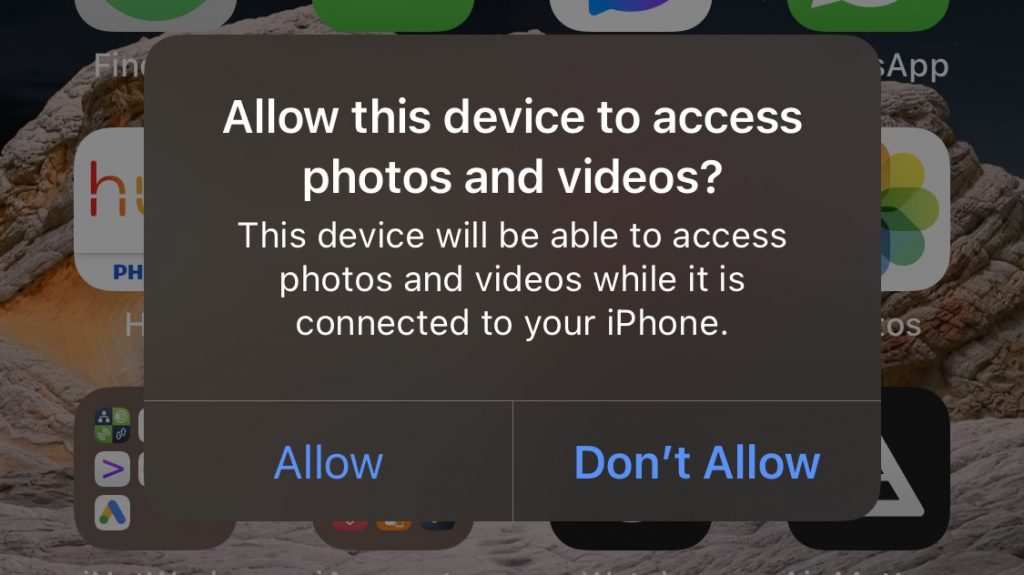
Once the iPhone is connected to the Windows PC, the iPhone screen will ask us to we authorize access to pictures and videos. "Allow", then we enter iPhone Unlock PIN.
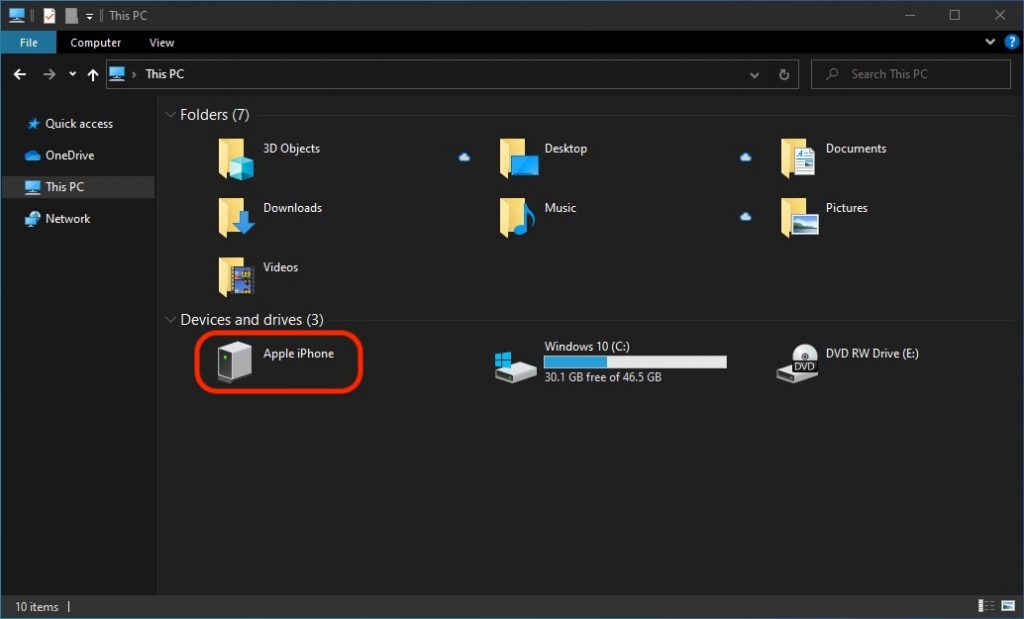
After this step, the photo and video storage drive will appear in Windows PC, from where you can easily copy to the hard drive or an external storage unit.
For Mac users, transferring photos and videos from iPhone or iPad is just as easy, through the "Photos" application. Connect the iPhone to the Mac via the data cable, open the "Photos" application and use the "Import" option.
Method 3:
Although the iPhone, iPad and iPod Touch devices come with the newest generations Bluetooth, the transfer of photos and videos cannot be done via this protocol to an Android smartphone or to a laptop with Windows / Linux.
The only option is "AirDrop", for owners of Apple devices. By Airdrop you can transfer any document between Apple devices, without being restricted by the use of an iCloud account. The condition is that the two devices between which the transfer is made must be nearby and have Bluetooth and Wi-Fi activated. AirDrop technology can use these two transfer protocols simultaneously, thus providing speed and stability.